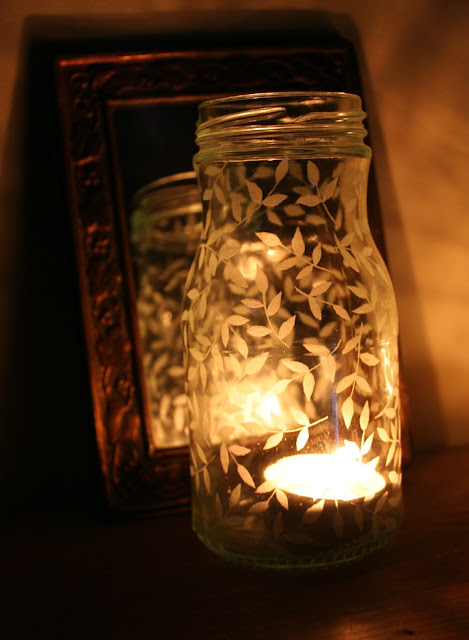
Tutorial; Etched tea light holders.
A little while ago I etched a couple of jam jars to use as tea light holders. Someone very kindly pinned the photographs onto a board on the Pinterest site and since then I've had quite a few visitors via the pin. So because of this I thought that I would write a short tutorial for anyone wanting to make their own.
So here goes...
- First you will need to find some glass jars or bottles. Vintage bottles look great etched so these could be used to as single stem flower vases perhaps.
- To do the etching you will need a small etching tool. Mine has no brand name on but the type of tool you will need can be found by clicking on the following link to give you some idea of the cost involved: http://www.amazon.co.uk/ENGRAVER-ENGRAVING-CERAMIC-MACHINE-ENGRAVE/dp/B007HM3TOI/ref=sr_1_10?ie=UTF8&qid=1357509238&sr=8-10

- As well as the etching tool you will need a set of etching 'nibs'. These are the ones that I have, they were approximately £8 from Hobbycraft. I tend to use the nibs with the ball at the end because I find those easier to handle but if you play about a bit you'll soon see which ones you get on with.

- I use one of the jars for practising on. It can be a little daunting to start a new piece but this way you can get a feel for the tool and see which nib makes which mark. I find the trick with etching on glass is to be more firm handed than delicate as the vibrations of the tool can give a wobbly line.
- Another tip is to try and work against a dark background, this enables you to see the marks you are making much more easily. You could pop a black piece of paper inside the jar to aid with this.
- When you feel confident enough you can start to decorate your first piece. It's not difficult at all to do. Just hold the etching tool the same way that you would hold a pencil and draw into the glass. You'll make little mistakes but if you go slow enough you should be able to ensure that they are not too bad and you may even be able to make it look like they are part of the design!!
This is the first bottle that I etched this morning. It's a really simple design and not too taxing but looks quite cute all the same.
This is my second design...getting a little more confident with straight lines here.
They look really lovely when the candles are lit. I think they would look great at weddings as part of a table display or for the Christmas dining table too.
It's really up to you what your design will be and what you etch onto, just have fun with it.
This is a more detailed jar with lots of surface pattern added.
And this leaf design is my favourite, I'm in the process of adding this to the pains of glass in my front door. I've finished two pieces but I still have four to go. I think I'll wait until the weather warms up a bit to tick that job off my 'to do' list though.
I hope this inspires one or two of you to give it a try and if you do, send me a picture and I'll show everyone here at The Pea Pod your handy work.
This would be a great weekend project to do with teenage children, they'd love it I'm sure. Well have fun and have a wonderful week, what ever you're up to!


really gorgeous, great to see how it's done! Heather x
ReplyDeleteHello Lizzie. Firstly thank you so much for my wonderful give away gifts. I love the post card you sent with the blue bird. Will have a place in my new room at Tim's.
ReplyDeleteI might give this a go, candle light is a necessary need rather then a romantic luxury at the cottage.
Been clearing up and packing up boxes of wool. I have far too much stuff!
x
great tutorial lizzie i must say i found the leaf deign rather lovely too x
ReplyDelete